Creating Our First Web Page

Hi There …
For the ones who've been following our build your own site tutorials; We are finally ready to create our first web page. Yep , bungee jumping ain’t got nothing on this.

To start, we’ll refer back to an earlier post and take it from there. That post is : Setting up your development environment.
We want you to remember this info:
"Think of HTML as the structure of the site, the frame, the brick walls without the windows, or the doors, or the roof, etc. The HTML is just the main structure(no doors, no windows ...), in which we insert everything else, the buttons, the forms, the sliders etc."
Remember setting up our development environment for the different operating systems? Windows Development Environment , Mac Development Environment , and Ubuntu Development Environment ? Well we'll be using that work, and that knowledge to get going on your first page.
Remember that first page we loaded(visited), the one rendered by entering in the url http://localhost. That url hits the index.php/index.html in your local server.
Let's slow it down for you shall we? every domain name; https://pressphp.com, https://google.com, https://facebook.com, https://instagram.com, https://sinutab.com, is mapped to to a server. Actually it's mapped to a folder in the server(points to folder in a server). Remember a server is a computer (drive), that can host our site files, and is able to execute them(run them). A server has folders just like any other computer. Now take a deep breath ... There are these things called virtual hosts. What they do is map each domain name to a folder in the server. For instance, my linux peeps will realise that their default apache file, the index.php is in the /var/www/html/ folder of the PC. This folder, where the domain maps/points to; is called the root directory. Every traffic that cames through the site(server) goes through the root directory.
Alright ... Okay ... take a deep breath. Maybe try reading the paragraph above again, it's quite important that you grasp these concepts at this stage of your learning journey.
Every root folder in an Apache server is called an index file. Note that this can either be an index.php or an index.html file. Every request to the site goes through the index file, and this file directs the traffic to the right places in the server.
Open your text-editor ( Sublime Text ) , and then open the "index.html" file to view it. Don't worry, we'll show you exactly where to find the file we're talking about below.
FOR WINDOWS :
This file would be in \xampp\htdocs
FOR MAC :
This file would be in /Applications/XAMPP/xamppfiles/htdocs/
FOR UBUNTU :
This file would be in /var/www/html/
The file should look something like this:
<!DOCTYPE html PUBLIC "-//W3C//DTD XHTML 1.0 Transitional//EN" "http://www.w3.org/TR/xhtml1/DTD/xhtml1-transitional.dtd">
<html xmlns="http://www.w3.org/1999/xhtml">
  <!--
    Modified from the Debian original for Ubuntu
    Last updated: 2014-03-19
    See: https://launchpad.net/bugs/1288690
  -->
  <head>
    <meta http-equiv="Content-Type" content="text/html; charset=UTF-8" />
    <title>Apache2 Ubuntu Default Page: It works</title>
    <style type="text/css" media="screen">
  * {
    margin: 0px 0px 0px 0px;
    padding: 0px 0px 0px 0px;
  }

  body, html {
    padding: 3px 3px 3px 3px;

    background-color: #D8DBE2;

    font-family: Verdana, sans-serif;
    font-size: 11pt;
    text-align: center;
  }

  div.main_page {
    position: relative;
    display: table;

    width: 800px;

    margin-bottom: 3px;
    margin-left: auto;
    margin-right: auto;
    padding: 0px 0px 0px 0px;

    border-width: 2px;
    border-color: #212738;
    border-style: solid;

    background-color: #FFFFFF;

    text-align: center;
  }

  div.page_header {
    height: 99px;
    width: 100%;

    background-color: #F5F6F7;
  }

  div.page_header span {
    margin: 15px 0px 0px 50px;

    font-size: 180%;
    font-weight: bold;
  }

  div.page_header img {
    margin: 3px 0px 0px 40px;

    border: 0px 0px 0px;
  }

  div.table_of_contents {
    clear: left;

    min-width: 200px;

    margin: 3px 3px 3px 3px;

    background-color: #FFFFFF;

    text-align: left;
  }

  div.table_of_contents_item {
    clear: left;

    width: 100%;

    margin: 4px 0px 0px 0px;

    background-color: #FFFFFF;

    color: #000000;
    text-align: left;
  }

  div.table_of_contents_item a {
    margin: 6px 0px 0px 6px;
  }

  div.content_section {
    margin: 3px 3px 3px 3px;

    background-color: #FFFFFF;

    text-align: left;
  }

  div.content_section_text {
    padding: 4px 8px 4px 8px;

    color: #000000;
    font-size: 100%;
  }

  div.content_section_text pre {
    margin: 8px 0px 8px 0px;
    padding: 8px 8px 8px 8px;

    border-width: 1px;
    border-style: dotted;
    border-color: #000000;

    background-color: #F5F6F7;

    font-style: italic;
  }

  div.content_section_text p {
    margin-bottom: 6px;
  }

  div.content_section_text ul, div.content_section_text li {
    padding: 4px 8px 4px 16px;
  }

  div.section_header {
    padding: 3px 6px 3px 6px;

    background-color: #8E9CB2;

    color: #FFFFFF;
    font-weight: bold;
    font-size: 112%;
    text-align: center;
  }

  div.section_header_red {
    background-color: #CD214F;
  }

  div.section_header_grey {
    background-color: #9F9386;
  }

  .floating_element {
    position: relative;
    float: left;
  }

  div.table_of_contents_item a,
  div.content_section_text a {
    text-decoration: none;
    font-weight: bold;
  }

  div.table_of_contents_item a:link,
  div.table_of_contents_item a:visited,
  div.table_of_contents_item a:active {
    color: #000000;
  }

  div.table_of_contents_item a:hover {
    background-color: #000000;

    color: #FFFFFF;
  }

  div.content_section_text a:link,
  div.content_section_text a:visited,
   div.content_section_text a:active {
    background-color: #DCDFE6;

    color: #000000;
  }

  div.content_section_text a:hover {
    background-color: #000000;

    color: #DCDFE6;
  }Don't worry, we'll show you exactly where to find the file we're talking about below.

  div.validator {
  }
    </style>
  </head>
  <body>
    <div class="main_page">
      <div class="page_header floating_element">
        <img src="/icons/ubuntu-logo.png" alt="Ubuntu Logo" class="floating_element"/>
        <span class="floating_element">
          Apache2 Ubuntu Default Page
        </span>
      </div>

      <div class="content_section floating_element">
        <div class="section_header section_header_red">
          <div id="about"></div>
          It works!
        </div>
        <div class="content_section_text">
          <p>
                This is the default welcome page used to test the correct
                operation of the Apache2 server after installation on Ubuntu systems.
                It is based on the equivalent page on Debian, from which the Ubuntu Apache
                packaging is derived.
                If you can read this page, it means that the Apache HTTP server installed at
                this site is working properly. You should <b>replace this file</b> (located at
                <tt>/var/www/html/index.html</tt>) before continuing to operate your HTTP server.
          </p>

          <p>
                If you are a normal user of this web site and don't know what this page is
                about, this probably means that the site is currently unavailable due to
                maintenance.
                If the problem persists, please contact the site's administrator.
          </p>

        </div>
        <div class="section_header">
          <div id="changes"></div>
                Configuration Overview
        </div>
        <div class="content_section_text">
          <p>
                Ubuntu's Apache2 default configuration is different from the
                upstream default configuration, and split into several files optimized for
                interaction with Ubuntu tools. The configuration system is
                <b>fully documented in
                /usr/share/doc/apache2/README.Debian.gz</b>. Refer to this for the full
                documentation. Documentation for the web server itself can be
                found by accessing the <a href="/manual">manual</a> if the <tt>apache2-doc</tt>
                package was installed on this server.

          </p>
          <p>
                The configuration layout for an Apache2 web server installation on Ubuntu systems is as follows:
          </p>

          <ul>
                        <li>
                           <tt>apache2.conf</tt> is the main configuration
                           file. It puts the pieces together by including all remaining configuration
                           files when starting up the web server.
                        </li>

                        <li>
                           <tt>ports.conf</tt> is always included from the
                           main configuration file. It is used to determine the listening ports for
                           incoming connections, and this file can be customized anytime.
                        </li>

                        <li>
                           Configuration files in the <tt>mods-enabled/</tt>,
                           <tt>conf-enabled/</tt> and <tt>sites-enabled/</tt> directories contain
                           particular configuration snippets which manage modules, global configuration
                           fragments, or virtual host configurations, respectively.
                        </li>

                        <li>
                           They are activated by symlinking available
                           configuration files from their respective
                           *-available/ counterparts. These should be managed
                           by using our helpers
                           <tt>
                                <a href="http://manpages.debian.org/cgi-bin/man.cgi?query=a2enmod">a2enmod</a>,
                                <a href="http://manpages.debian.org/cgi-bin/man.cgi?query=a2dismod">a2dismod</a>,
                           </tt>
                           <tt>
                                <a href="http://manpages.debian.org/cgi-bin/man.cgi?query=a2ensite">a2ensite</a>,
                                <a href="http://manpages.debian.org/cgi-bin/man.cgi?query=a2dissite">a2dissite</a>,
                            </tt>
                                and
                           <tt>
                                <a href="http://manpages.debian.org/cgi-bin/man.cgi?query=a2enconf">a2enconf</a>,
                                <a href="http://manpages.debian.org/cgi-bin/man.cgi?query=a2disconf">a2disconf</a>
                           </tt>. See their respective man pages for detailed information.
                        </li>

                        <li>
                           The binary is called apache2. Due to the use of
                           environment variables, in the default configuration, apache2 needs to be
                           started/stopped with <tt>/etc/init.d/apache2</tt> or <tt>apache2ctl</tt>.
                           <b>Calling <tt>/usr/bin/apache2</tt> directly will not work</b> with the
                           default configuration.
                        </li>
          </ul>
        </div>

        <div class="section_header">
            <div id="docroot"></div>
                Document Roots
        </div>

        <div class="content_section_text">
            <p>
                By default, Ubuntu does not allow access through the web browser to
                <em>any</em> file apart of those located in <tt>/var/www</tt>,
                <a href="http://httpd.apache.org/docs/2.4/mod/mod_userdir.html">public_html</a>
                directories (when enabled) and <tt>/usr/share</tt> (for web
                applications). If your site is using a web document root
                located elsewhere (such as in <tt>/srv</tt>) you may need to whitelist your
                document root directory in <tt>/etc/apache2/apache2.conf</tt>.
            </p>
            <p>
                The default Ubuntu document root is <tt>/var/www/html</tt>. You
                can make your own virtual hosts under /var/www. This is different
                to previous releases which provides better security out of the box.
            </p>
        </div>

        <div class="section_header">
          <div id="bugs"></div>
                Reporting Problems
        </div>
        <div class="content_section_text">
          <p>
                Please use the <tt>ubuntu-bug</tt> tool to report bugs in the
                Apache2 package with Ubuntu. However, check <a
                href="https://bugs.launchpad.net/ubuntu/+source/apache2">existing
                bug reports</a> before reporting a new bug.
          </p>
          <p>
                Please report bugs specific to modules (such as PHP and others)
                to respective packages, not to the web server itself.
          </p>
        </div>

      </div>
    </div>
    <div class="validator">
    </div>
  </body>
</html>
Take a deep breath – we’re gonna unpack this easily for you. So don’t worry, this is a LOT easier than it seems.
A page is made up of html tags, these are html components that represent different parts of the page.
Let’s start with a simplified version of this bad boy above, in fact, you don’t have to worry about this one above . We’re gonna start you nice and slow and easy. And explain as much as we can, because this is a critical part of your learning journey:
<!DOCTYPE HTML>
<html>
    <head>
    <title>Title of the document</title>
    </head>
    <body>
        The content of the document......
    </body>

</html>
Copy this text, open your text editor, and replace the text in the index.html/index.php. REPLACE EVERYTHING IN THIS FILE WITH THE TEXT ABOVE.
Let’s start at the top; this
<!DOCTYPE html>is the DOCTYPE declaration. this is not an html tag, this just lets the browser no what version of html you will be using in your html. This one above is to declare that this is an HTML5 document.
To declare an HTML 4.01 strict we use this declaration:
<!DOCTYPE HTML PUBLIC "-//W3C//DTD HTML 4.01//EN" "http://www.w3.org/TR/html4/strict.dtd">To declare XHTML 1.0 Transitional:
<!DOCTYPE html PUBLIC "-//W3C//DTD XHTML 1.0 Transitional//EN" "http://www.w3.org/TR/xhtml1/DTD/xhtml1-transitional.dtd">Next we look at the HTML tags :
<html>

</html>
These tell the browser that we’ll be dealing with HTML in this document. Yes it’s a document … HTML Tags also represents the root of an html document, and acts as a container for all the other html tags. That’s why all the other tags are in there.
The next tag we’ll look at is the head tag:
<head>

</head>
The head element is a container for all the head elements. Head elements are title, style, base, link, meta, script etc. These are the descriptive parts of the page, the parts that let you and the bots that crawl the site know exactly what the page is all about.
As you've noticed, we use html tags and html elements interchangeably across the site. Get used to this, the world wide web uses the same terms for the same thing extensively. These won't be the last.
In our example HTML above, the title element gives the page title.
<title>Title of the document</title>Change the text in the title tag to anything you want, reload the page, and you can see it at the top of the page ; in the tab section.
That ‘Dev Week Part 1’ in the tab space; that’s the title.
"Alright, alright, alright ...
This is a good time to take a break and marvel at how much you’ve learned so far. That’s okay; give yourself a tap on the shoulder, you’ve taken a giant step. You've done well Friend, you did good. Well done! Bravo!
The next HTML element is the body tag:
<body>
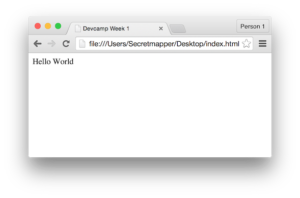
</body>Everything you see in the browser is written in this part of the document. In our html, this is where the The content of the document…… is placed. Replace this text with this text (Hello World) and you’ll have your first Hello World!! … Reload the url and you’ll see the hello world in the browser; like so :
"As we progress with our journey, this page will look a lot more like a professional site"
The Village Geek
And the world says hello to you too fellow programmer … Hellooo from the other siiiiddddeee ...
In the next section we'll look at other parts of the site development journey, and implement them into the html we’ve build so far.
As we progress with our journey, this page will look a lot more than a professional site. So hang around, there’s still a lot more excitement to explore :)
Cheerio …
Cape Town , South Africa